Lab 4: Characterize Your Car
Objective
After we learned how to implement sensors on their own, we want to get familiarized with the rest of the hardware, which is the stunt car. In this lab, I would start exploring the car by documenting the basic dimensions, the powering time period, the speed range, and the overall control experience.
Prelab
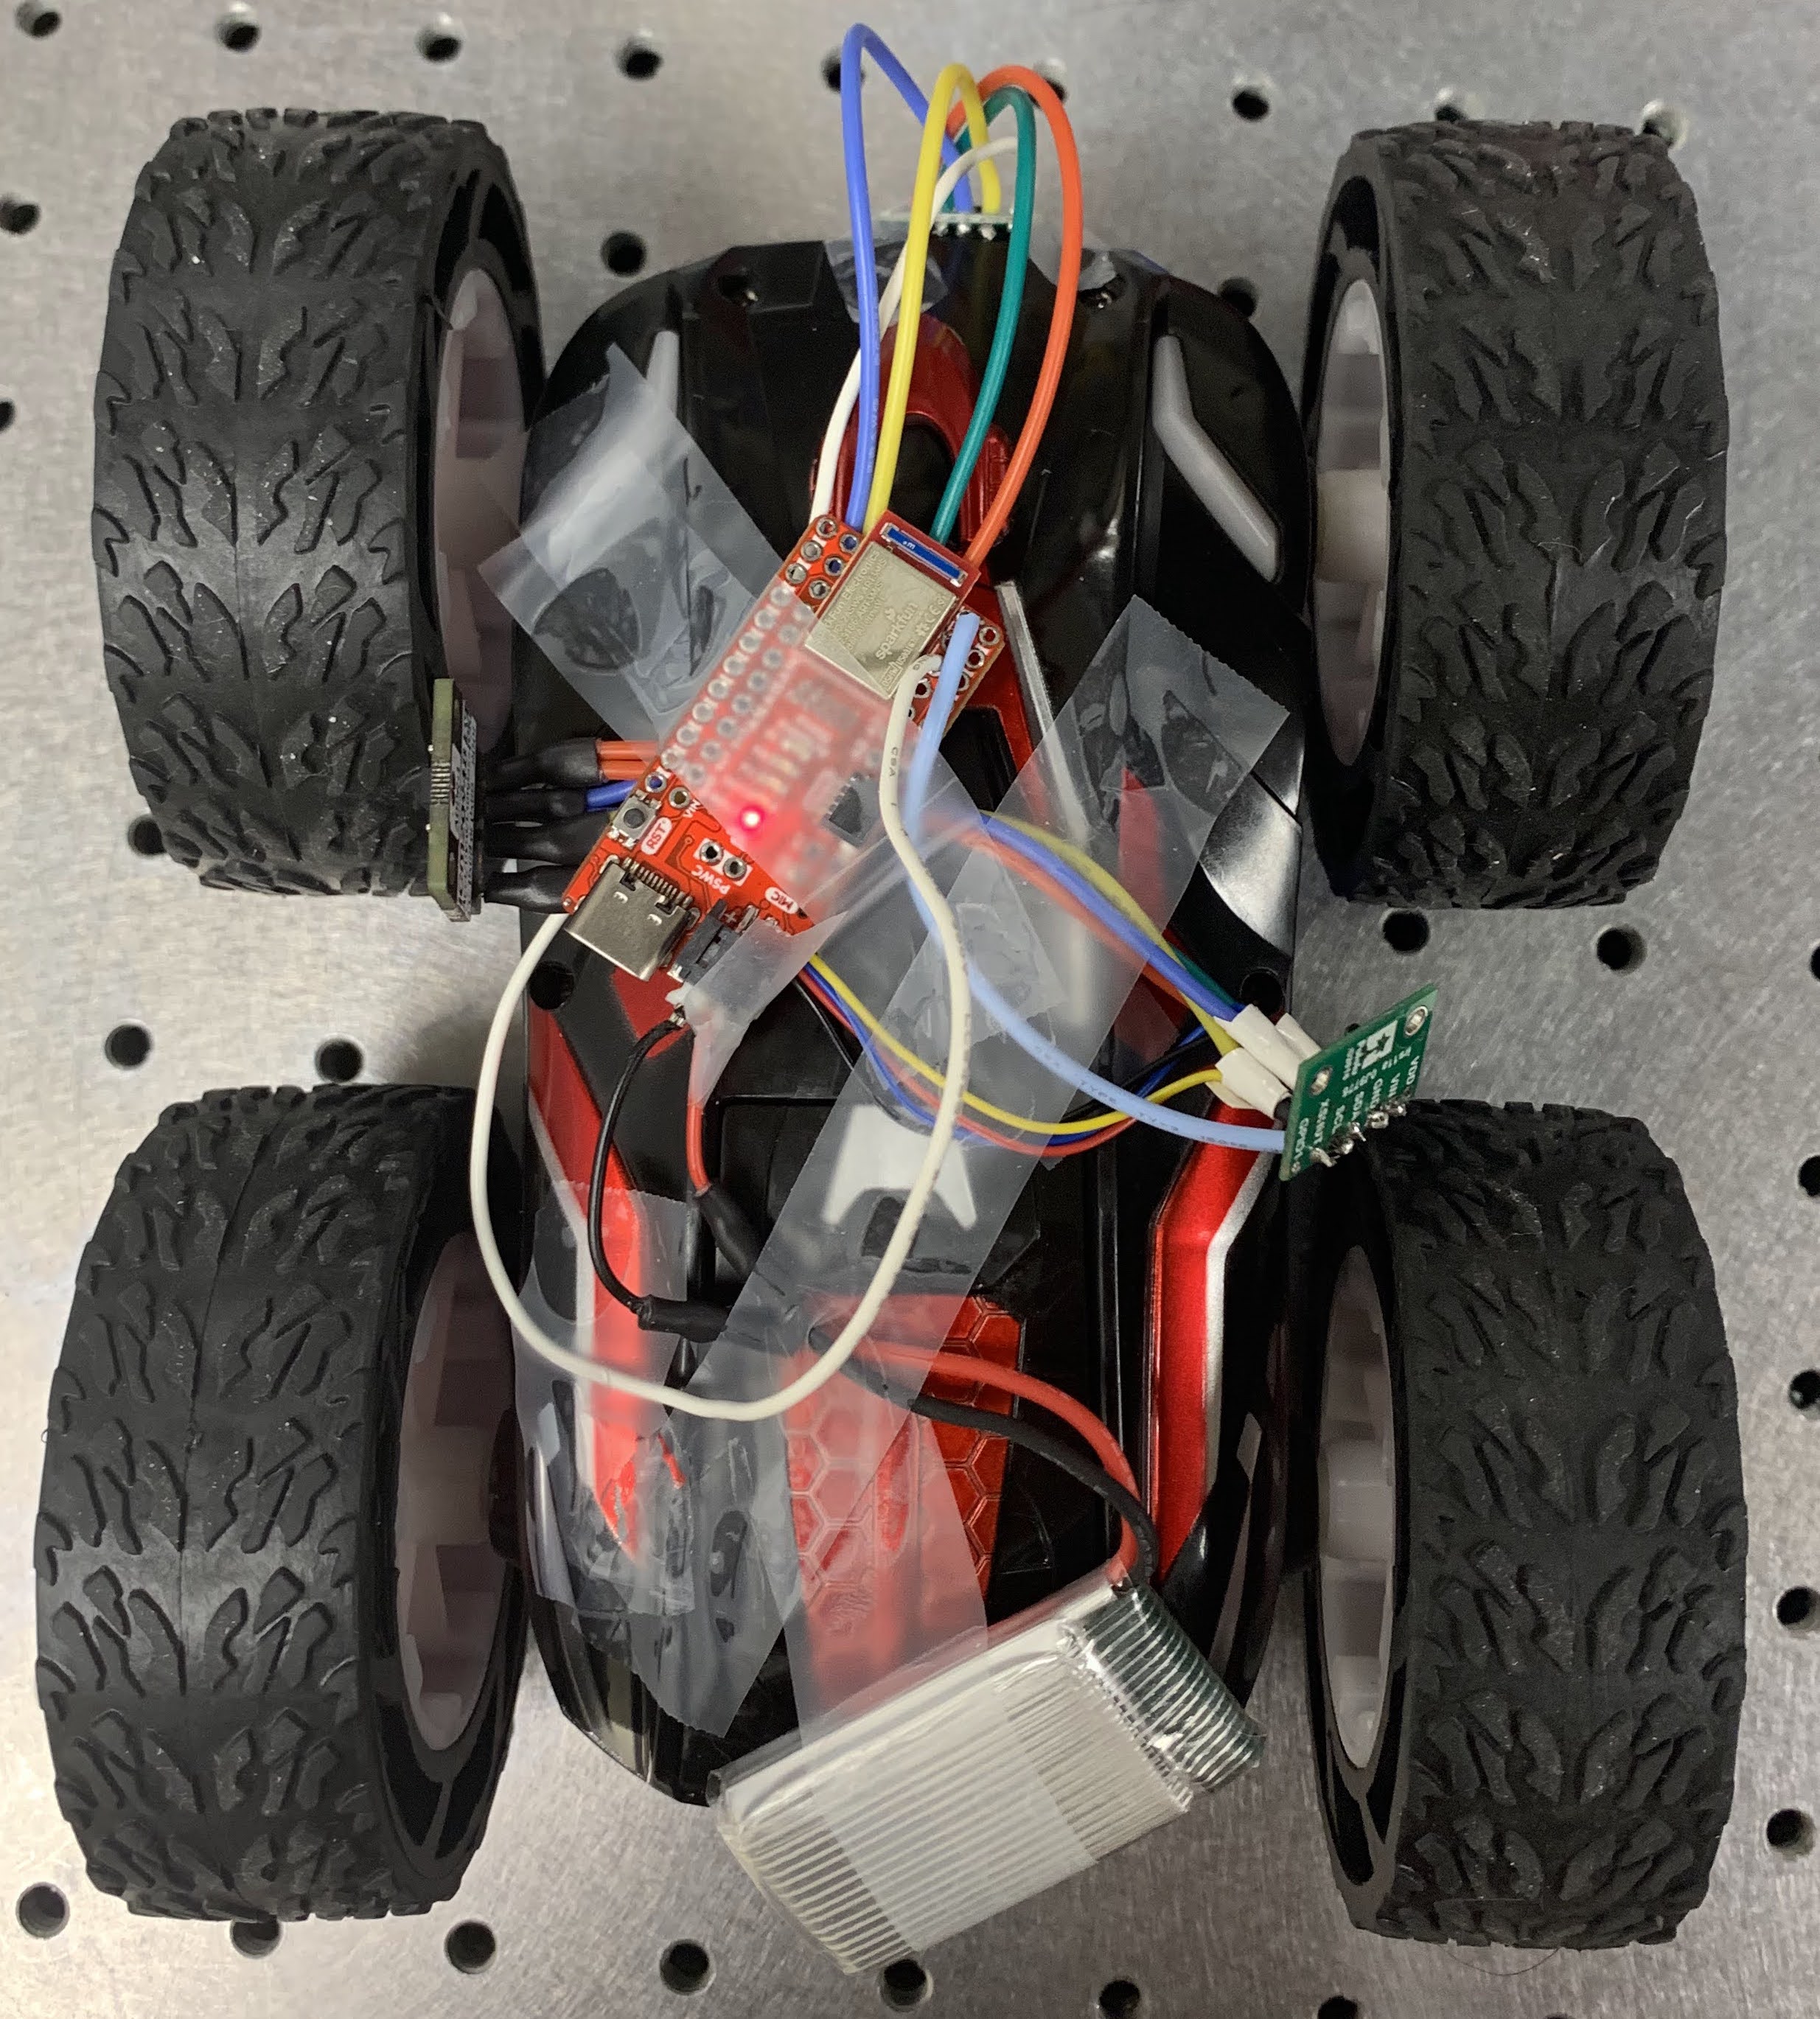
Since we want to combine the sensors setup from lab 3, we have to power the Artemis board with battery directly without the connection to computer. We have two 650 mAh batteries from the car kit and one 850 mAh battery from the lab kit. Since the motor is the major power consumption of the car and the control, we take one 650 mAh battery to power the Artemis board and the 850 mAh one to power the motor. First, we have to replace the black male connector of the battery with JST connector to fit the connection to power up the Artemis board. I cut the connection short and soldered the wires between the connector and the battery together. The colors of the wires are differed from each other, but I doubled-checked that the polarities are correct before connecting it to the board.

Characterization
Part A
-
Dimensions of the car:
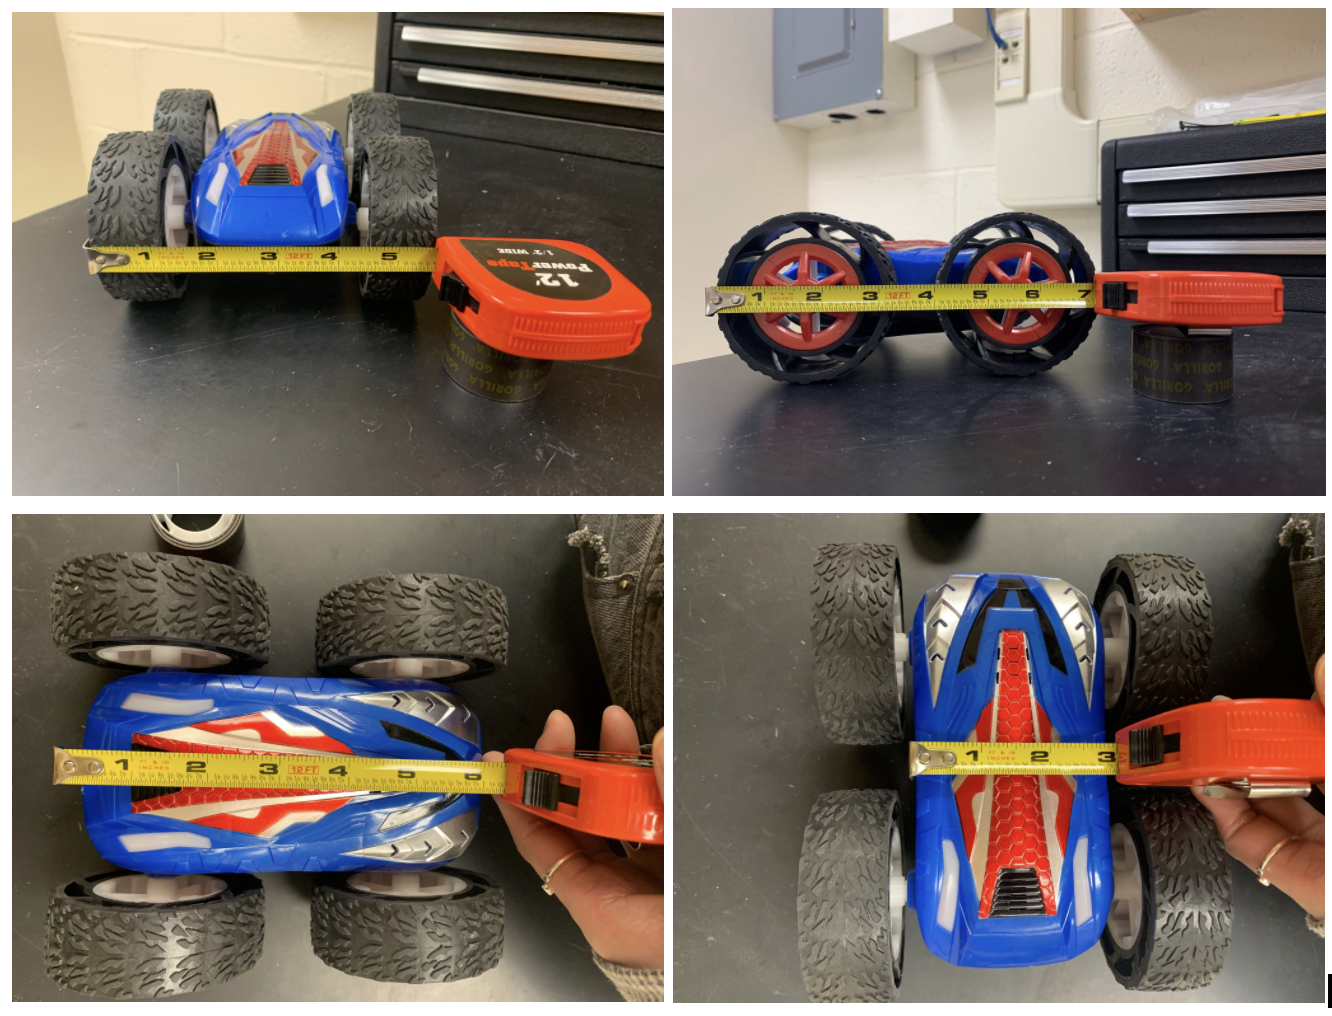
I think it’s important to know the basic dimensions of car, so the data can be used to analyze the functionality in small spaces. The dimensions of the car itself provide an idea of how big is the space to attach all sensors on. According to the product information, the car is 5.75’’ wide and 7.15’’ long. I checked it again with a tape measure, and it showed that the longest length is 7.0625’’ (18 cm) from the front wheel to the back wheel. The width including two wheels is 5.625’’ (14.3 cm). As for the car body, the length and width are 6.125’’ (15.55 cm)and 3’’ (7.6 cm)respectively. The height is 5.8 cm high.

-
Weight of the car:
The car weighs 518 g with a 850 mAh battery inside, and weighs 502 g for the net weight. The weight can be used to calculate the force if we have the acceleratiokn data. Also, it tells us how portable is the car. -
Charging time:
Charging time affects the preparation time to do a robot test. If we know the charging time in advance, we can include the time on the schedule to make the testing plan more efficient. I chose to measure the charging time of the 650 mAh battery that comes with the car since I didn’t charge the 850 mAh battery myself. I used the charging cable that comes with the car, it takes around 102 min to charge the battery to full. I assumed it takes longer time to charge the 850 mAh battery. -
Battery life time:
Battery life provides an important message that how long can each test cylce last. I tested the battery life of a fully-charged 650 mAh battery by running it continuosly to power the forward motion of the car. The starting voltage of it is 4.23 V. As the test continued more than 30 minutes, which is longer than my expectation, I measrued the voltage to check the discharging status so far. The battey still showed 3.86 V.
Part B
- The range of speed, acceleration, and the braking distance:
I used the 850 mAh battery to power the car and applied the ToF sensor setup in Lab 3 to this measurement. First, I connected the battery I mentioned in prelab to the Artemis board to power it up. All sensor parts, along with the battery, are taped onto the car during the test. One ToF sensor is taped in the front of the car, which is used to document the current distance of the car. Since the long sensing mode is effective until 4 m, I set the starting point of the test 3 meters away from the wall. When the test starts, I pressed the forward button shortly and released it. I tried to brake the car smoothly without hitting the wall but failed after several trials.
 For the arduino and bluetooth conneciton, I utilized the
 write_data()function from the ble_arduino package, and combined thetx_characteristic_float(BLE_UUID_TX_FLOAT, BLERead | BLENotify)in BLEFloatCharacteristic to write the speed data to the board. Then, I received all data from the notification handler that I built in Lab 2.

 From the graph, it showed that the speed can go from 0 to 2386 mm/s. However, if the accleration distance is longer, I think it can go to a higher speed than this. I approximated the braking distance from the graph by extending the braking region til zero speed. In this way, the outcome won’t be affected by the crash in the end. The braking distance is around 3.58 m by calculating the area under the extended slope line. As for the acceleration, I took two neighboring data points with the sharpest slope to represent the maximum acceleration that it can achieve, and the number for it is 6018.3 mm/s^2.

-
What surfaces can it handle?
The car runs smoothly on the rubber tile flooring. I also tried it on a doorway rug, and it runs through it easily. One difference is that running on a rug reduces the drift for the car during the motion, so it’s actually easier to control it on a rough surface. -
What stunts can it do?
Its best trick is to brake immeditately, flip itself to the other side, and keep going for the next round. It can also ride specifically on the same side of the wheels, but it doesn’t last long. When it hits an obstacle, it flips itself and tries to start motion on the opposite direction. - How reliably does the robot turn around its own axis?
The reliability depends on the surface that it is running on. I tested on the rubber tile floor, and the deviation from the starting point is small. Also, the deviation mostly shows up at the end of the motion when I tried to stop. The deviation distance I measured is around 4.5 cm. The clockwise and counterclockwise spin tend to have the same behavior. - How well is the car operation with manual control? In this part, I set up an area containing 5x5 pieces of tiles, and mark each corner with a bottle of glue (just something I happened to find!). I started the car at the right bottom corner, and hope to touch each corner without knocking out any bottles of glue and going outside of the tile area. However, the manual control is not great at braking and turning. Since it doesn’t have a brake, I have to estimate the distance and release the forward button as accordingly to perform a ‘brake’ before going outside the field or hitting the marks. As for turning, it can’t go to really small angle precision to adjust the direction. I have to adjust the right/left button back and forth to set a relatively good direction to go on each corner. Finally, I’m still a new driver so I might get used to the operation more after multiple testings!